Working with tables
Tables (grids) appear in many places across the application, e.g, on the Tickets page in the Table view mode, on the Objects page in the Table view mode, etc. In this chapter, you will find useful tips for working with tables that are common for all tables in the app.
Table views
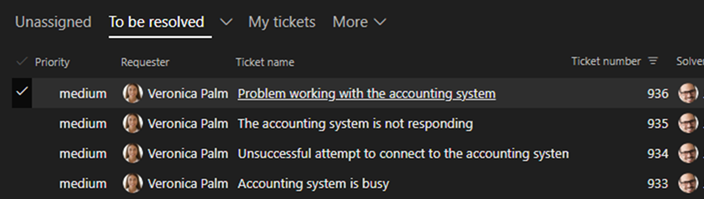
Choose a specific view of the table by clicking on one of the tabs above the table. The active view's name is underlined. Whenever you need to refresh the content of the active view, click on it's tab.
The More tab's dropdown contains a list of additional views. If there are no additional views the tab is not displayed. You can pin an additional view to the main tab bar by selecting it from the More tab dropdown and then use the Pin command from the view's menu. Similarly, to move a pinned view to the More dropdown use the Unpin command.
Sorting
If you want to sort table rows by a column, simply click on the header of that column. If you want to reverse the order click on the column header again. You can also use the Sort ascending and Sort descending commands from the column dropdown menu.
This way you choose the primary sorting column. To add a secondary sorting column, hold Ctrl or Shift key and click on the header of the secondary column. Click again to reverse the order. This way you can add also tertiary and other sorting columns.
Resizing and reordering columns
Adjust the width of a column by grabbing the right edge of its header with the mouse and moving it to the right or left.
You can also change position of a column by dragging it with mouse in the table header.
Filtering
To find rows in a large table by specific values in a column, open the column's dropdown menu and select the values under the Search box:
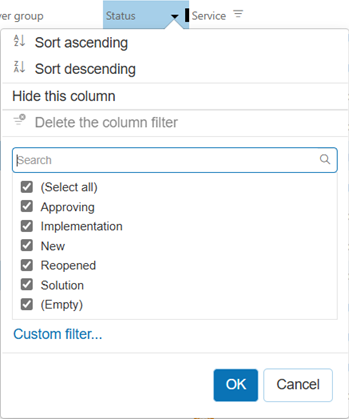
The table will only display rows containing the selected values in the column. The funnel icon in the column header indicates that the column filter is active. You can filter by multiple columns at the same time. The list of column values in the column dropdown menu then only offers values that appear in rows that match the other column filters.
Use the Delete the column filter command or check the (Select all) option to clear the column filter and display rows regardless the value in the column.
For advanced filtering, use the Custom filter.
Customizing table views
When you sort a table, change size or position of columns, filter rows, etc., your changes are not persisted by default. The view automatically restores to its initial status when you refresh the page in your browser. Use the Save the view settings command from the view dropdown menu to persist the changes you have made.
Active view commands
The active view's dropdown menu offers the following commands:
-
Display columns - add or remove columns to/from the active view. To hide a column, you can also use the Hide this column from the column's dropdown menu.
-
Create copy of the view - create a new view by copying the active view. If you want to keep the new view, don't forget to save it with the Save the view settings command.
-
Rename - rename the active view.
-
Move - change the position of the active view in the view tab bar. You can also drag the view's tab by the mouse.
-
Pin - pin the view to the tab bar to make it unnecessary seeking it in the More tab dropdown.
-
Unpin - unpin the view from the tab bar. The view will move into the More tab dropdown.
-
Share - share the active view with other users. They will be able to select the view from the More - Shared views dropdown menu and pin it to the tab bar if desired.
You will automatically become the owner of the shared view. Only the view owner and members of the Administrators group can edit shared views. If you edit the view, it will also change for all users with whom you share it.
On the Tickets page, this command is only available to service team members.
-
Sharing settings - share this view with other users or cancel sharing for specific users. Removing all users will cancel sharing of this view and the view will disappear from the More - Shared views menu. Only if the user had the shared view pinned will it automatically converted to their own unshared view, which they will be able to edit.
You can also transfer ownership of this view to another user. After that, you will no longer be able to edit this view.
This command is only available to the owner of the active shared view.
-
Delete - permanently delete the active view.
-
Save the view settings - save the current size of table columns, their position, filter etc. The next time you use this table view, it will open in the saved state. This command is only available if you've changed the view state.
-
Restore the view settings - undo changes to column size, position, filter, etc.
-
Analyze in MS Excel Sheet - export the content of the table to an Excel Sheet (.xlsx).
Regularly backup your settings on the user menu - Settings - Settings backup page. If you accidentally delete or damage the table views, you will be able to restore them from the backup. You can also restore all views to their default state using the Settings backup - Restore default settings command.